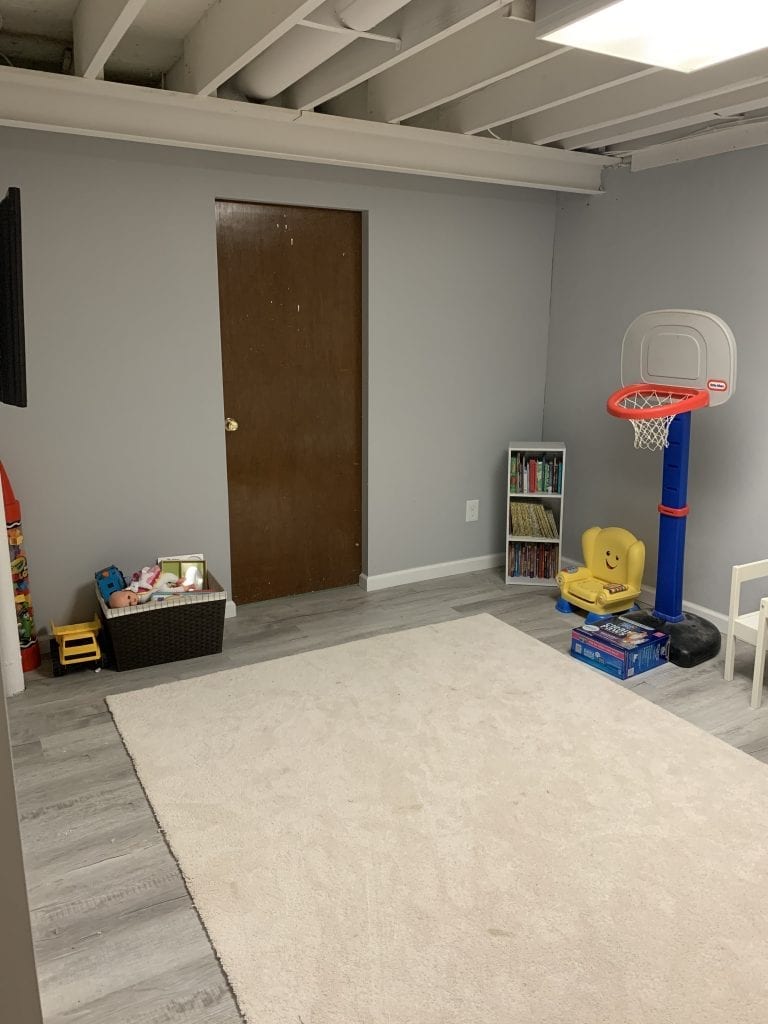
Our home was mostly a construction zone a few years ago as we made some long-overdue renovations. The first big update was to our 50-year-old kitchen in December 2018. Then, in 2019, our basement flooded, which was the nudge we needed to update our basement. So, finally, after nearly two years of constant renovations, we updated our home. It only took us 12 years to get to this point.
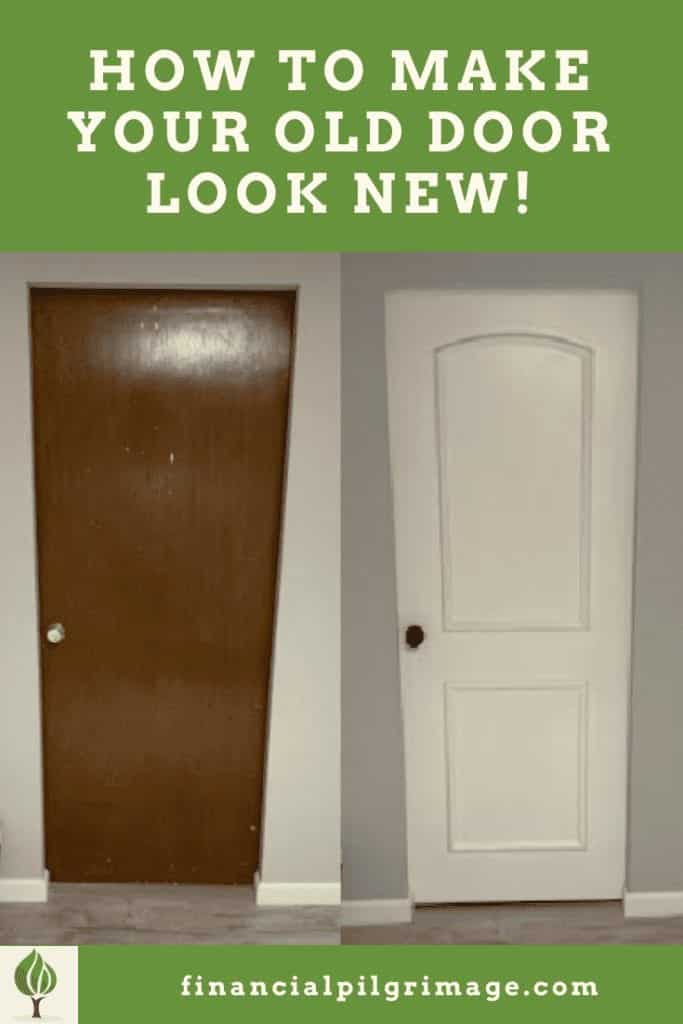
This post will focus on one aspect: updates to an old wooden door (several, actually), all for less than $100 per door.
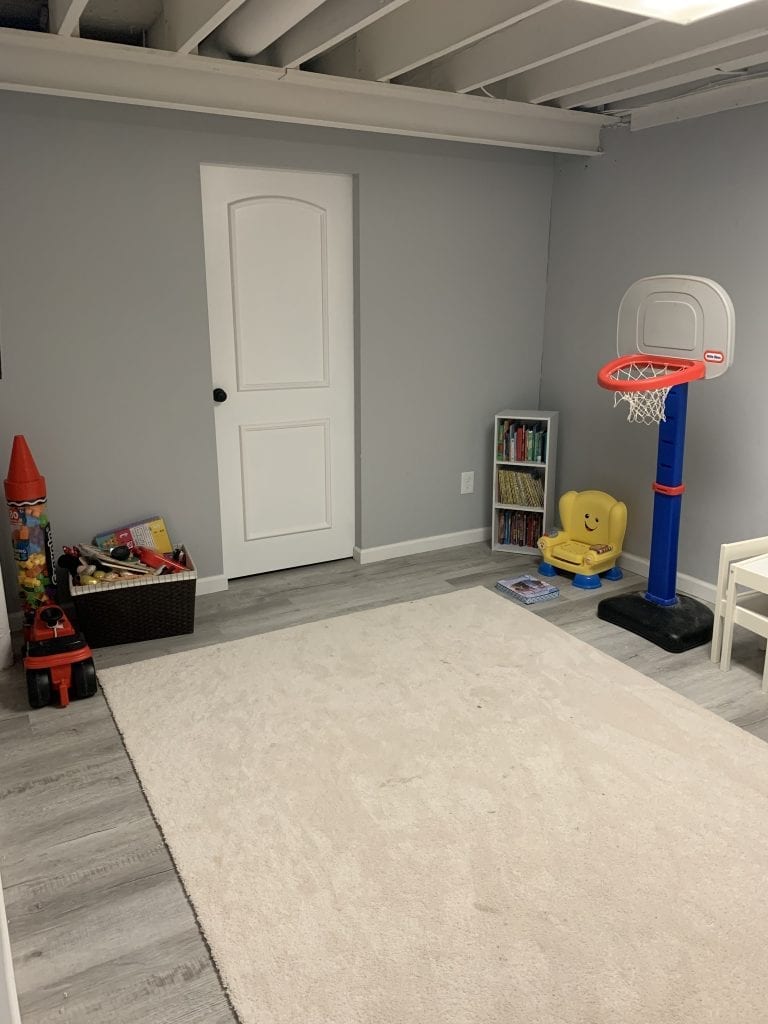
When I looked up estimates to replace interior doors, the average price was around $600-$700 per door. Multiply that by four doors in the basement and eight doors upstairs. It adds up. In the end, finishing these doors myself saved us thousands of dollars.
Painting Interior Doors to Look New For Less Than $100
Before you read on, please know that I am not an expert. I’m not very handy at all, so the fact that I have figured this out is nothing short of a miracle. The steps below reflect what I’ve learned from watching a few YouTube videos and reading articles.
That said, the steps reflect the exact process I’ve gone through to update the doors myself. To achieve the cost of less than $100 per interior door, I will assume you have essential tools for the job. I’ll be sure to call out what tools I already had available and what I had to go out and purchase for this job.
Step 1: Remove the Door from the Hinges and Prep the Door
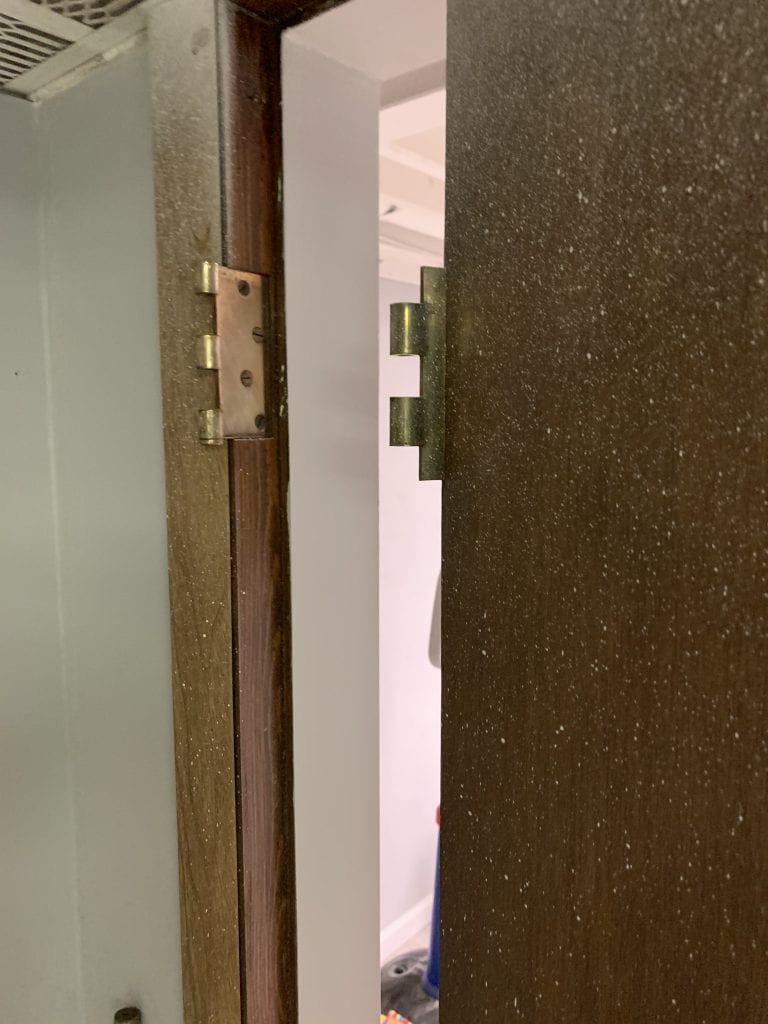
This one is relatively straightforward. Take a flat-head screwdriver and pop up the hinges of the door. Before purchasing replacement parts, note whether the hinges require three or four screws and buying replacement parts appropriately. Removing the door from its hinges is not a requirement, but it makes painting much more manageable. Plus, if you are replacing the hardware or painting the trim, you may as well lie the door flat to keep the paint from running. This approach is much cleaner and prevents you from using painter’s tape.
Be sure to wipe down the door to remove dust before getting started. If your door has any blemishes you’d like to smooth over, now would be a great time to apply joint compound (mud) to fill in any gaps. Don’t worry about being perfect when using it, as you’ll sand down the area several times. Several of our doors had chips and dings, especially near the bottoms. The joint compound helps to make the door look as good as new.
Be sure to remove all hardware from your door before beginning. Removing hardware includes the doorknob and hinges. Most doorknobs have outward-facing screws that you can easily remove. If there are no visible screws, there will likely be a small slot towards the base of the knob that you can use a flat-head screwdriver to pop off.
Tools and Materials Needed:
- Flat-head screwdriver
- 2 Sawhorses (or similar)
- Rags
- Joint Compound (optional)
Step 2: Prime Back Side of Door
You’ll want to decide before starting if you want to add trim to one side or both sides of the door. We only add trim to one side for two of our interior doors since the back side will not be visible in most situations.
Once you have the door removed from the hinges and the hardware removed, you’re ready to get to work.
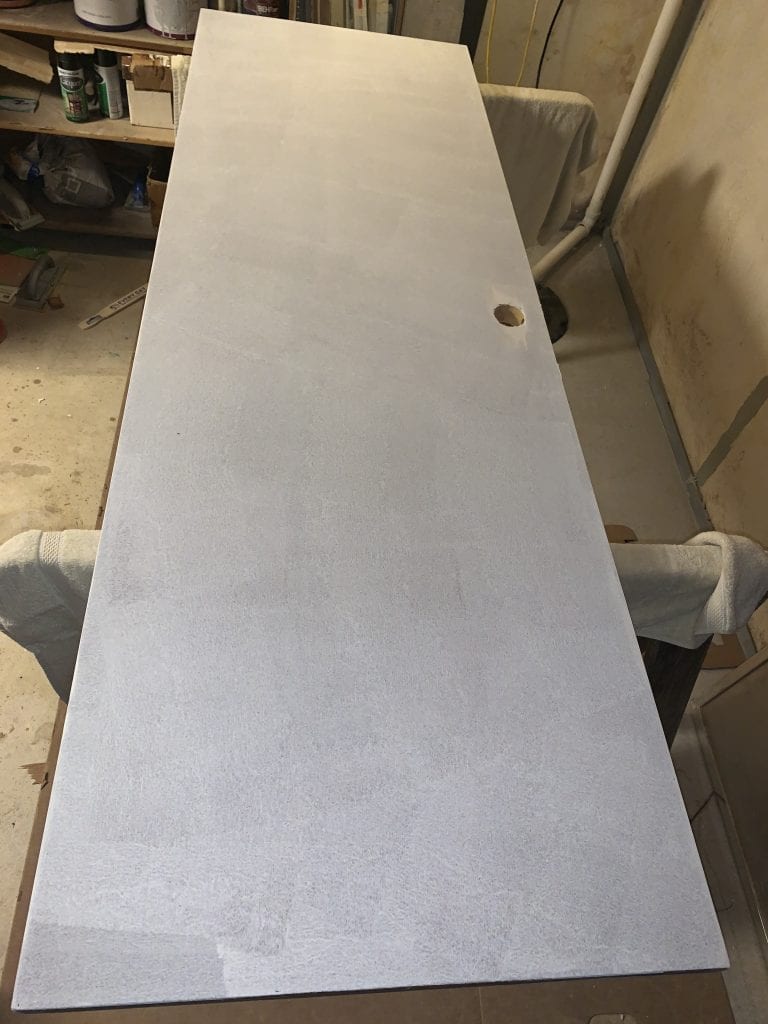
Before priming, you’ll want to wipe the door and sand it. Make sure you sand down the sides of the doors as well. I used 120-grit sandpaper and this relatively inexpensive Ryobi sander. You can also sand by hand if you don’t have a sanding tool.
Pro Tip: If you plan to update multiple doors, put your paint pans in a trash bag between sessions. I had one pan for paint and one for primer. Having individual rollers for each makes it much easier as well.
After you sand and wipe down the surface, it’s time to apply the first coat of primer. Again, I used a standard roller brush designed for smooth surfaces. Two coats of primer were involved, and I usually waited at least three hours before applying the second coat.
Pro Tip: If you use a roller to paint the sides of the door, be sure to wipe the underside of the door with a rag. Otherwise, the primer will drip, and the other side of the door will need to be sanded more thoroughly around the edges.
Tools and Materials Needed:
- Primer (We used Killz)
- Roller paintbrush
- Paint pan
- Trash bags to cover paint pans
- 120 grit sandpaper
- Rags
Step 3: Paint the Back Side of the Door
After applying two coats of primer, the next step is to paint the door with a first and second coat. You must choose the right kind of paint. It’s best not to use flat or eggshell paint as they are not as durable. Instead, we used high-quality semi-gloss paint made by Valspar.
Before painting, you’ll want to sand the door again with 220-grit sandpaper to give it a smooth finish. Then, after wiping down the door from sanding, you’re ready to paint.
Like priming, I used a roller brush for all surfaces, waiting at least 3-4 hours between coats.
Tools and Materials Needed:
- Paint (High-quality semi-gloss)
- Roller paintbrush
- Paint pan
- Trash bags to cover paint pans
- 220 grit sandpaper
- Rags
Step 4: Repeat Priming and Painting the Door
Be sure the paint from the backside of the door is fully dry (at least 24 hours) before flipping over to the other side. Otherwise, some paint may stick to the sawhorse, and you must start over again.
Step 5: Add Trim to the Front (and Back) Side of the Door
What puts the finishing touch on the door is the trim. We used this trim set from Home Depot. It comes with the trim frames, a template to measure, and the adhesive to glue the trim to the door. It currently retails for $33 per door.
Remember that if you want both sides of the door to have the trim, you’ll need to buy two sets. You can get away with only using one side of a closet door. However, you’ll probably want to buy two kits per door for bedrooms, bathrooms, and transition doors.
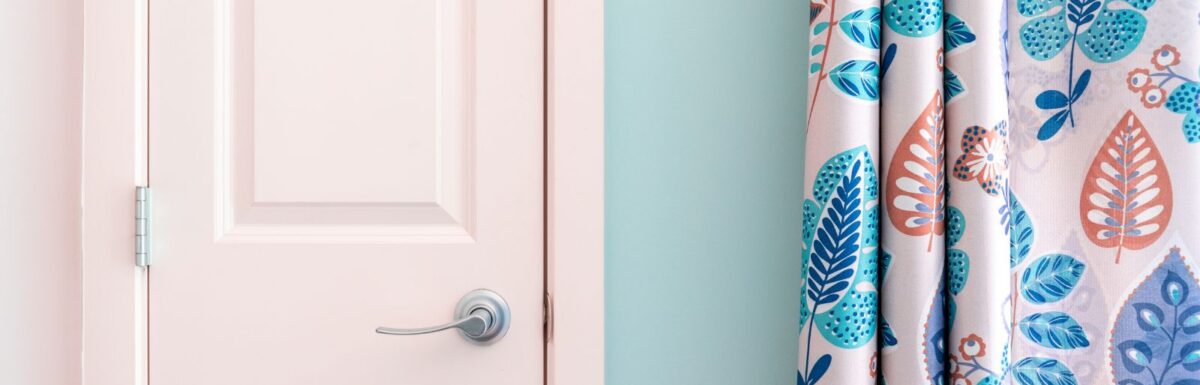
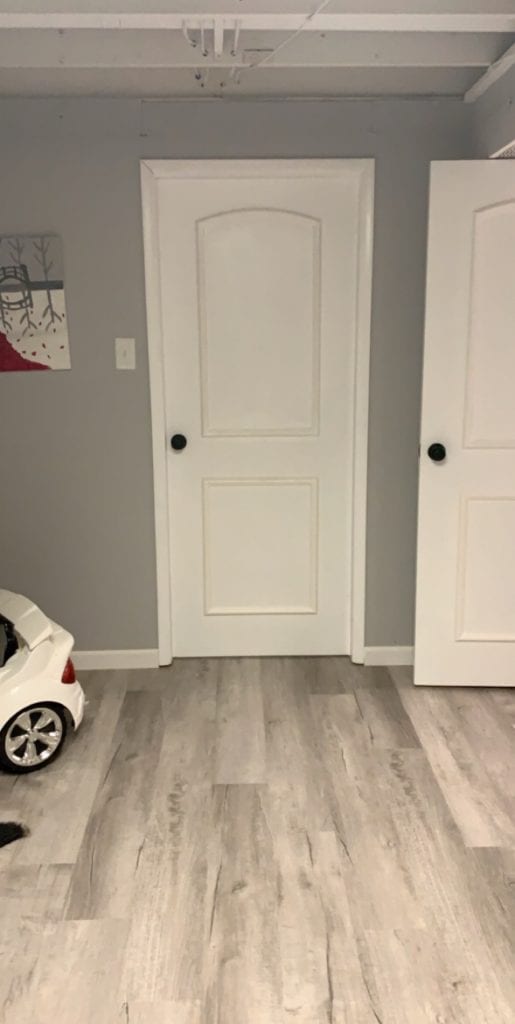
Going in, I was skeptical about how this trim would look when finished. The product is advertised as obtaining the cost of a high-end raised frame door at a fraction of the cost. After adding this trim to several doors, I can say it makes a huge difference. Just painting doors without the trim made the updates look cheap. However, once the trim was added to the doors, they looked like nice high-end doors.
Each package of door trim comes with adhesive along with a measuring kit. The measuring kit ensures alignment of the trim on your door. The trim is ideal for 28″, 30″, and 32″ doors, though I’ve added it to a 26″ door, and it looks good.
To glue the trim to the door, I would suggest the following steps:
- Align the trim on the door using the measuring kit without any adhesive.
- Take a pencil and mark off all four corners of the trim.
- Remove the trim and apply a thin coat of adhesive to the back of the trim. (The bond is strong, so don’t overdo it.)
- Set trim on the door with adhesive on the back of the trim.
- Put an item of moderate weight on each of the four corners of the trim. Let sit for a few hours until the adhesive dries.
- Repeat with a second trim set.
- Once dry, paint the trim with a paintbrush (the same color as the door).
TOOLS AND MATERIALS NEEDED:
- EZ-Door Trim Set
- Paint items included in Step 3
Step 6: Replace the Hardware and Hang the Door
Once the paint on the trim dries, it’s time to add the doorknobs and hinges. In our case, we decided to get all-new hardware, but you could always add the same hardware back to your door. Also, spray painting your current hinges and knobs could give them a fresh look if you decide not to buy new ones.
Ensuring new hardware is as close to the old hardware as possible is essential. Even minor changes can result in your door not closing correctly. Out of the four doors we’ve replaced, one rubs on the door jamb when closing a bit. I believe it’s because the hinges on that door were slightly different than the other doors.
Applying your hardware is relatively straightforward. Screw on the hinges and ensure any new doorknobs fit into the old slots. Then, put them on the same way you took them off. Once the hardware is on and you rehang the door, it’s time to enjoy your beautiful new door!
Tools and Materials Needed:
- Hardware (hinges and knobs)
- Screwdriver (flat head and Phillips)
Total Cost of Painting Interior Doors
Now, not everything listed above is included in the cost of replacing your old wood door. I will assume that you have specific tools and materials to start, such as a flat-head screwdriver, sawhorses (or something similar), and rags. Also, the paint cost is average, assuming you are updating several interior doors simultaneously. A one-gallon can of primer and one-gallon can of paint are enough for about eight doors.
- EZ-Door Trim: $65 (assuming both sides)
- Hardware: $20 (doorknobs and hinges average per door)
- Paint and materials: $15 (average per door)
- Sandpaper $4 (average per door)
Total Cost = $99
The total cost of your doors can fluctuate depending on your approach. Some interior doors may only need the trim on one side. You may opt for higher-quality hardware. The more doors you have to update, the more paint, sandpaper, and other materials decrease in average cost.
I was highly skeptical that the doors wouldn’t turn out as well as they did. I’m so glad we found the trim kit because it makes a massive difference. Without the trim, the interior door looks like a cheap update. However, the trim does make it look more high-end. We’ve updated four doors in the basement so far and plan to update eight more doors upstairs. Ultimately, this will save us thousands of dollars compared to if we completely replace each door and frame.

Mark is the founder of Financial Pilgrimage, a blog dedicated to helping young families pay down debt and live financially free. Mark has a Bachelor’s degree in financial management and a Master’s degree in economics and finance. He is a husband of one and father of two and calls St. Louis, MO, home. He also loves playing in old man baseball leagues, working out, and being anywhere near the water. Mark has been featured in Yahoo! Finance, NerdWallet, and the Plutus Awards Showcase.